Here you have some guides to the first lab session. Please note, that this assumes, completing the installation steps of the virtual machine! Please note that all the necessary material for these practical sessions are stored in the catkin_ws folder. You can inspect this from the file manager (double click on the desktop icon) or using the terminal(black icon on the launch pane at left hand side) and starting mc(midnight commander) from the command line:

directory view: command line (in mc) and GUI view (nautilus)
To ensure that your resources are up-to-date, please press enter on the update.sh in the mc.
I/O and basic visualization
In this part you will learn about basic 3D data visualization. In order to to do so, please try to follow the next steps, first downloading this and extracting to the Desktop:
- Navigate to the ~/catkin_ws/src/pcl_demos/data directory using the mc. The open with a text viewer the 3D data file table_scene_lms400.pcd. You will see some header and hexa info. In order to convert it to ascii you should issue the following command: pcl_converter table_scene_lms400.pcd ascii.pcd -f ascii. If you reopen the ascii.pcd, you should see:
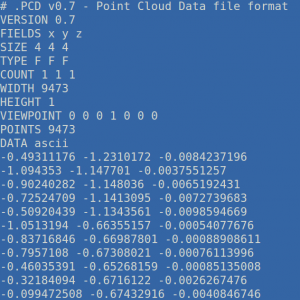 How many points are in this file? What other fields can you recognize? You can exit from this view pressing Esc. Next, can you add new point to the a point cloud? Check out for the total number/width fields!
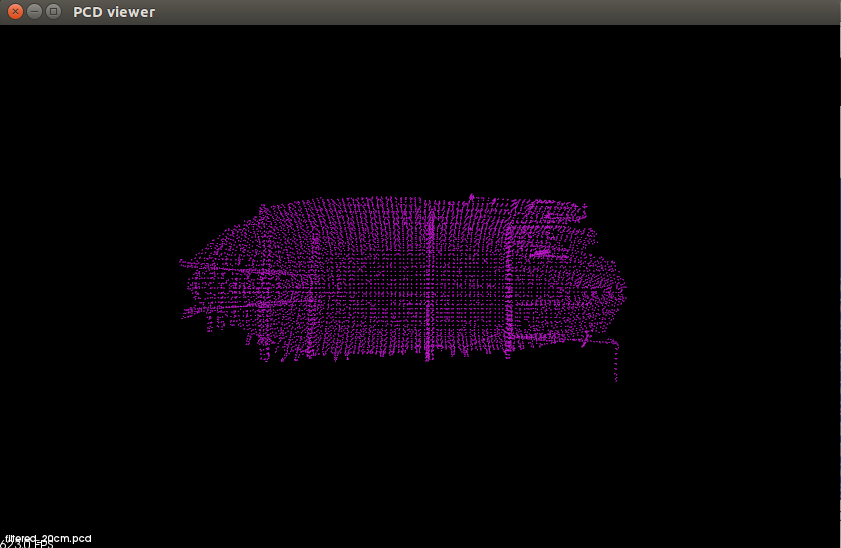
- In the next step you should visualize the content of this file as a spatial point cloud. To do so, please run pcl_viewer ascii.pcd in the command line (alternatively, you can hide the mc panes by pressing Ctr-O). You will see a window like:
 Try to move around (left click, scroll), press in turns 1,2,3,4 from the keyboard! If you need a picture of your current view, you can also press j! You can close this window either by the X sign in the left upper corner, or by pressing Ctr-C in the command line. For advanced command line options you can run pcl_viewer –help. Can you display the coordinate axis?
 - Should you need this PCD format in another one, compatible with major software tool? Please try yo see your options by entering pcl_pcd2ply or pcl_pcd2obj! Make sure that you use at least one of the above mentioned commands for a conversion, as you will need this in the next steps!
Basics of filtering and segmentation
In this part you can play around with different filters and segmentation options, using a 3D data processing pipeline. A short overview of this pipeline is here

As you can see in this Figure, the output of one module is connected as input to another one, i.e. the voxel filter is linked to the passthrough filter which is providing the output for the plane segmentation. Thus we will have to analyze each step of this chain. To do so, please:
- copy-paste into the catkin_ws/src the pcl_tutorial from the archive
- be sure to cd ~/catkin_ws/src/pcl_tutorial/cfg
- change the exec mode of the cfg files with chmod +x *cfg
- go back into ~/catkin_ws
- rebuilt with catkin_make
- type in the terminal the roslaunch pcl_tutorial tutorial.launch. You will see two windows similar to
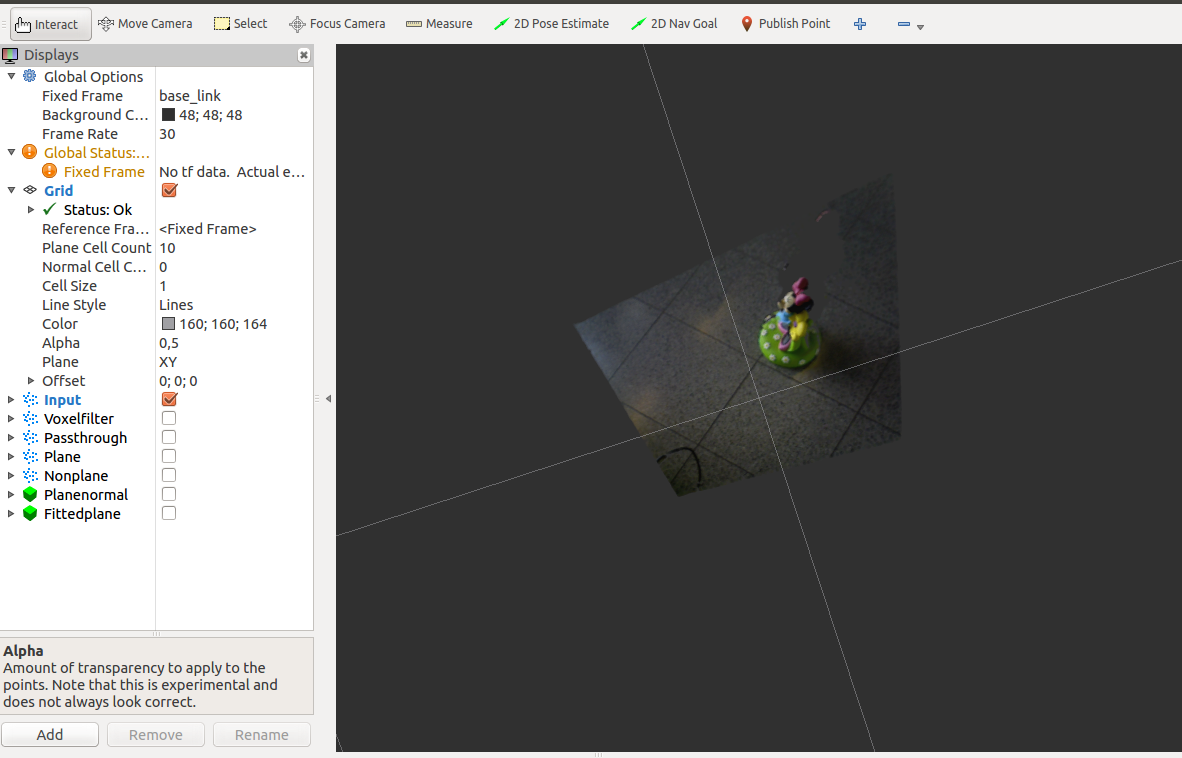
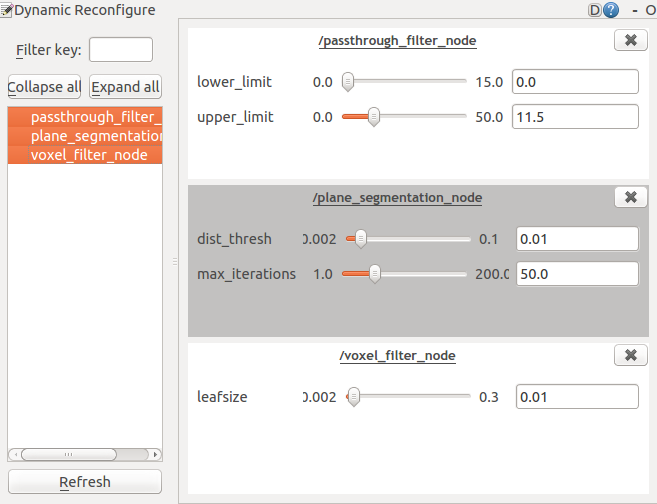 The first one contains the display of the 3D data as well as in the left part the different visualization options for the different filters (the thick boxes and the drop down lists). The second image lets you dynamically configure the parameters of these filters, i.e. passhthrough, plane segmentation and voxel filter. In order to understand the effect of these filters please try out the following steps:
- Check the box for the voxel filter, and then play around with the values of the filter parameter (i.e. in the dynamic reconfigure window)
- Check the box of the passthrough filter (you might want to disable the output of the rest at this point), and see what happens if you modify the minimum and maximum values around 0.5.
- Enable/disable the plane/nonplane options, and see the effect of the change in the plane segmentation parameters.
- Finally, display the fitted plane and normal to this plane with the last two options!
- You should stop this computationally intensive processing chain in the terminal by pressing Ctr-C!